
Remap Editor
Note Remapping
The Remap Editor lets you map individual notes to completely different pitches using a two-keyboard interface. Each mapping can have its own colour and label.
Enabling Remap Mode
Remap mode is enabled per row. Click the XPOSE/REMAP toggle in the destination pill and select REMAP, or click the keyboard icon button in the Core/Basics editor.
In remap mode, the transpose controls in Note Basics are replaced by a button to open the Remap Editor. Transpose is not applied in remap mode — the remap table determines all note output.
Making Mappings
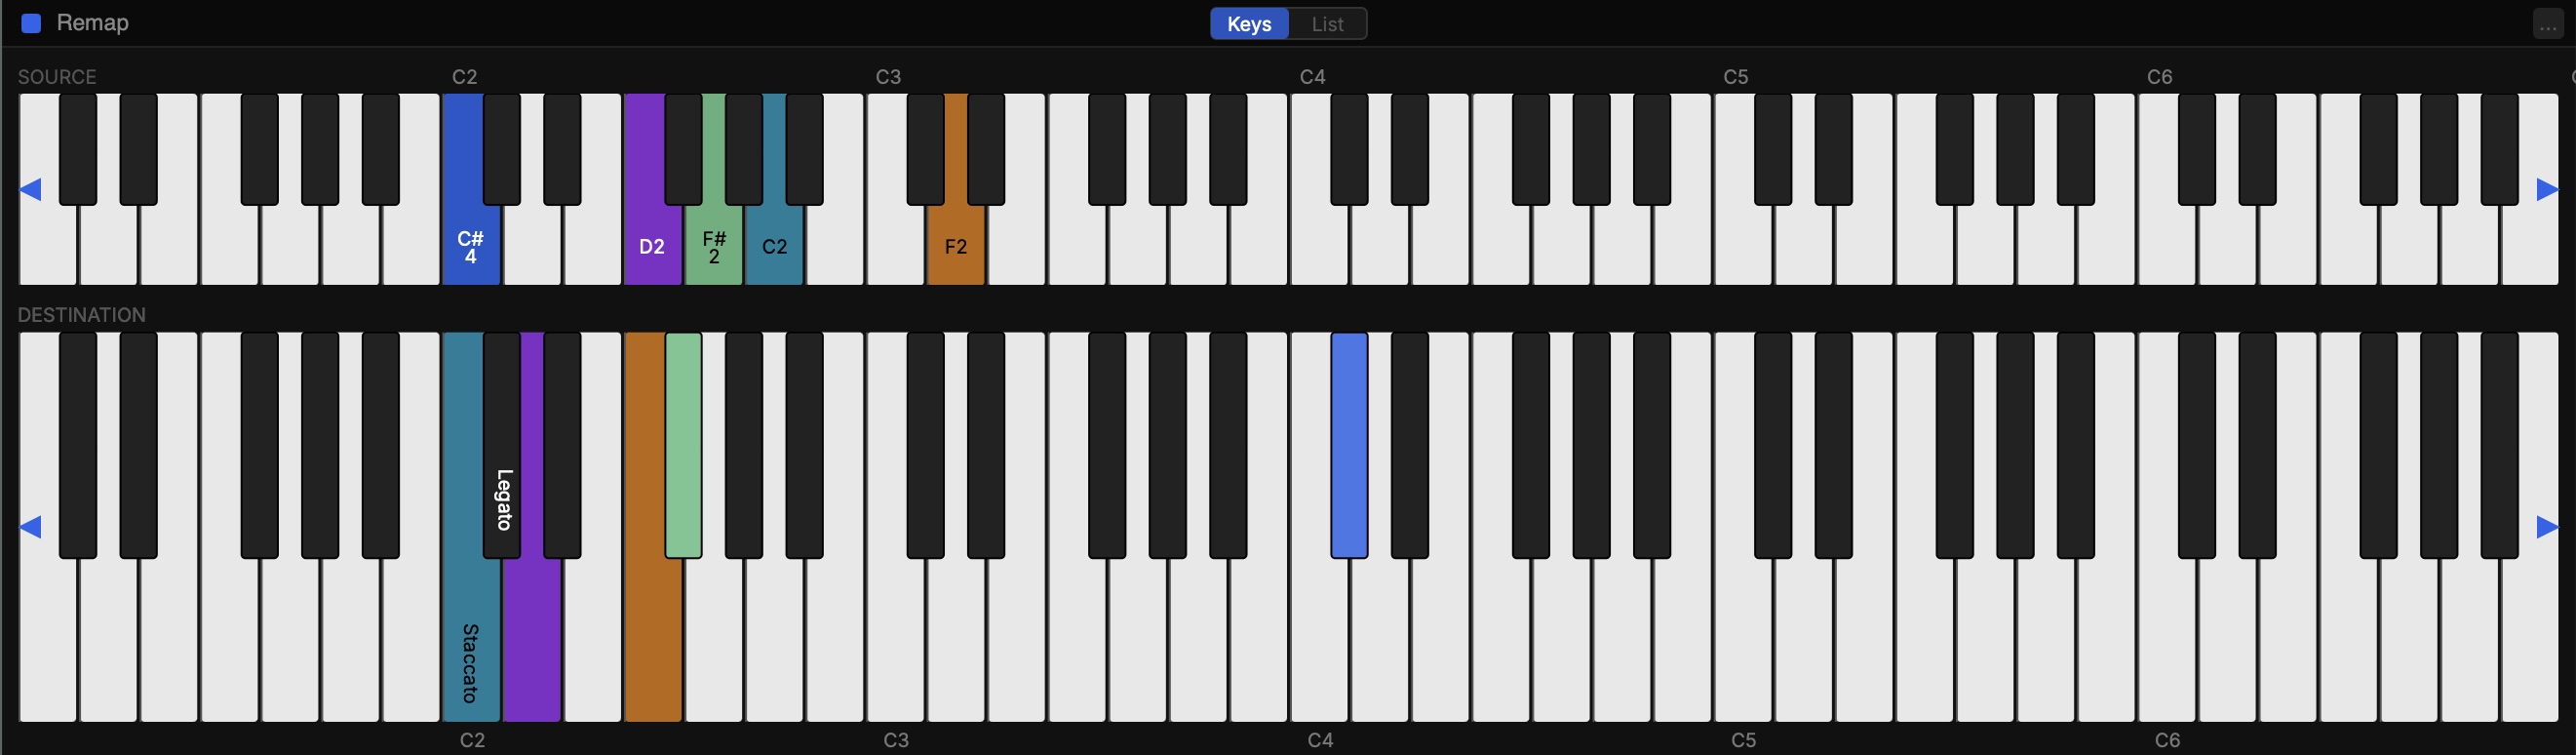
The Remap Editor shows two keyboards — source (top) and destination (bottom). Scroll either keyboard using the arrows on the left and right edges.
List View
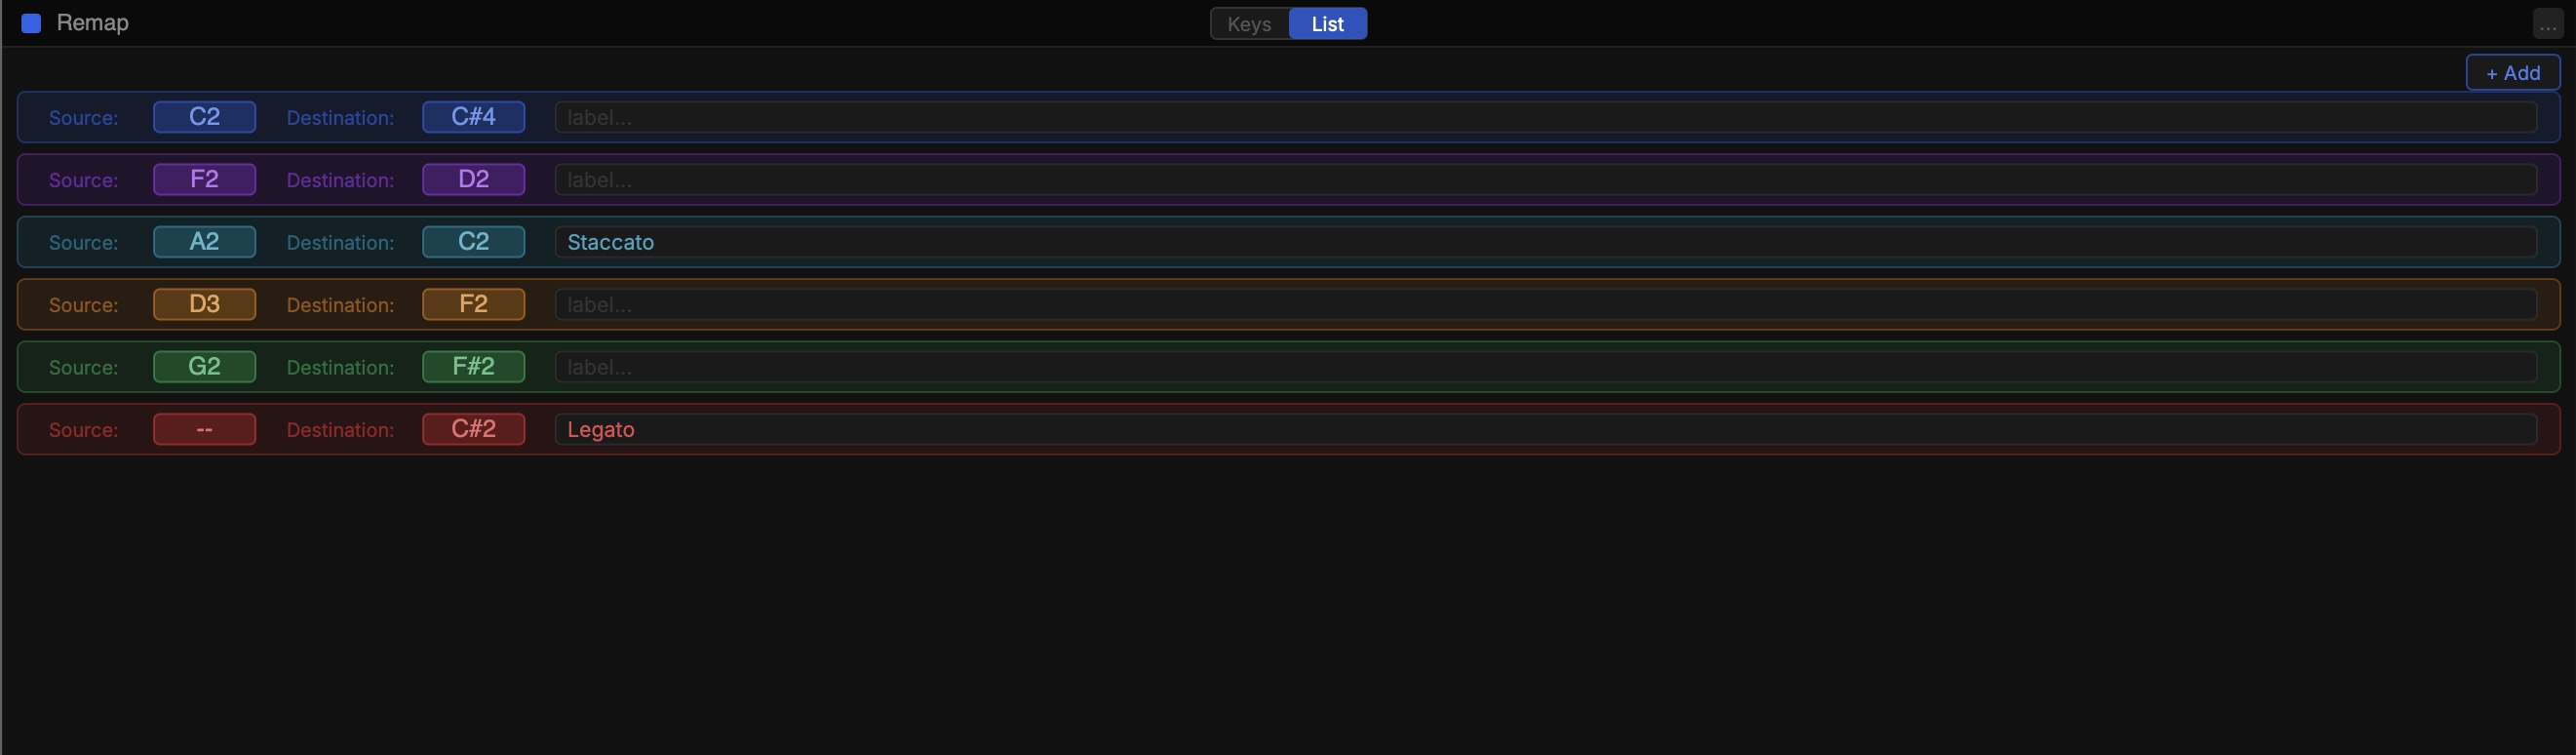
Switch between keyboard view and list view using the buttons at the top of the Remap Editor. List view shows all mappings in a table with source note, destination note, and label columns.
In list view you can edit note values directly by clicking them, and edit labels inline. Use the + button to add new empty rows.
Remap Presets
Remap tables can be saved and loaded as presets using the preset button in the Remap Editor header. This is useful for storing articulation maps for specific sample libraries.